Ultimaker 2+ Connect Unboxing and Setup [3D Universe]
Ultimaker 2+ Connect
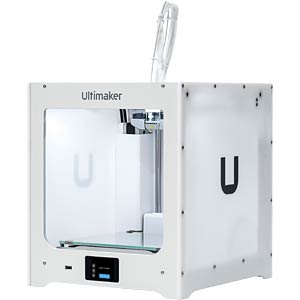
Ultimaker3D printer - FDM
AI summary
Introduction to Ultimaker 2+ Connect and its Set-Up
The Ultimaker 2+ Connect continues Ultimaker's legacy of precision and ease-of-use in 3D printing technology. Bundled with an optional Air Manager, this printer promises an accessible experience for both new users and veterans alike. Its unboxing and setup process highlights the simplicity with which one can get the printer operational, showcasing the meticulously designed user experience.
What's in the Box?
Upon unboxing, users are greeted with an array of accessories crucial for the printing process, including a spool of Ultimaker PLA silver filament, a power cord, a calibration card for bed leveling, a glass build plate with specific instructions for correct installation due to its treated surface, and a host of other tools and utilities such as spool holder, Ethernet cable for those opting for a wired connection, machine oil, grease for maintenance, spare nozzle, wrenches, and a USB flash drive for updates.
Installation and Features
The Ultimaker 2+ Connect is notable for its effortless setup process. The installation of the glass build plate, spool holder, and the preparation of the printer for its first use are straightforward. The tension lever feature for filament loading simplifies what could otherwise be a complex process. For those who opt for the Air Manager, its installation adds an extra layer of usability and safety by easily attaching it to the printer and connecting via the UMB cable. This piece of equipment is key for maintaining a clean printing environment.
Preparing for the First Print
After powering up, the printer guides the user through a firmware update and Wi-Fi setup with intuitive steps, showcasing the user-friendly nature of Ultimaker's software ecosystem. Loading the filament is made stress-free through a guided process on the printer's display, which assists in preparing the material for the first print. The procedure ensures the nozzle is heated correctly, and the filament fed through the printer is primed, ready for printing.
Test Printing and Final Thoughts
The Ultimaker 2+ Connect's performance is validated through a test print, which can be facilitated with included tools like a glue stick or preferred third-party adhesives. The quality of the test prints reflects Ultimaker's reputation for producing finely detailed 3D models with excellent surface finish. Users can expect to achieve high-resolution prints, depending on the settings chosen, balancing quality with print speed.
Overall, the Ultimaker 2+ Connect stands as a testament to Ultimaker's dedication to innovation and accessibility in 3D printing. The device not only simplifies the 3D printing process but also ensures that high quality and precision are maintained, making it an ideal choice for both educational environments and professionals seeking reliable 3D printing solutions.